Carren Yeliandi / 0376990
Typography / Bachelors of Design in Creative Media / Taylor's University
Task 1 Exercise 1 & 2
TABLE OF CONTENTS
LECTURES
Week 1 :
[How to create a blog] Blogger.com -> Fill identification and create blog
[The post format] New post -> Basic Identification and 5 main chapters
- Font : The individual font or weight within the typeface (ex. Georgia Italic, Georgia Bold)
- Typeface : The entire family of fonts/weights that share similar characteristics/style (Ex. Georgia, Arial)
[Main Source] Kane, J. (2002) A Type Primer. London, UK : Laurence King
[Timeline] (Western Perspective)
- Blackletter
- Oldstyle
- Italic
- Script
- Transitional
- Modern
- Square Serif
- Sans Serif
- Serif
Week 2 :
Lecture 2 : Text part 1
[Letter Spacing] To add space between letters
- Kerning = Automatic adjustment of space between letters.
- Tracking = The addition or removal of space in a word or sentence.
- Flush left = The most natural way as it mirrors the asymmetrical way of handwriting.
- Centered = Used sparingly as it creates a strong shape on the page
- Flush right = Used for captions where relationship between text and image might be ambiguous
- Justified = Not the best alignment because of the rivers or gaps in text that it creates
- X height = Between baseline and the median line
- Ascender < X height = more readibility
- Type size = must be readable at arms length
- Leading = 2-3.5 points larger than the font size for the large body text
- Line length = 55-65 characters per line
Week 3 :
Lecture 4 : Text part 2
- pilcrow : a holdover from medieval manuscripts seldom used today
- leading : space between paragraph
- indentation: the same size of the line spacing or point size of your text
- extended paragraph: created unusually wide columns of text
- widows : a short line of type left alone at the end of a column of text
- orphans : a short line of type left alone at the start of a new column
- Different kinds of emphasis require different kinds of contrast
- Can be done by changing it to italic/bold or a different font (be careful with the size). Another way is to box it by placing a field of colour at the back of the text.
- placing certain typographic element outside the left margin of a column to maintain a strong reading axis
- using quotation marks to create clear indents
- A head indicates a clear break between topics within a section (larger than the text)
- B head is subordinate to A head, indicating a new supporting argument for the topic on hand
- C head highlights specific facets of material within B head text
Week 4 :
Typo_2
Fig. 0 Terms in typography (21/10/24)
- uppercase : capital letters, including certain accented vowels
- lowercase : Include the same characters as uppercase
- small capitals : uppercase letterform draw to the x-height of the typeface
- uppercase numerals : lining figures, the same height as uppercase letters
- lowercase numerals: old style figures, set to x-height with ascenders/descenders
- Italic : Italian cursive handwriting (Oblique = the roman form)
- punctuation, miscellaneous characters : all fonts contain standard punctuation marks, miscellaneous characters can change from typeface to typeface.
- ornaments : used as flourishes
[Describing Typefaces]
- roman : uppercase form derived from inscriptions of roman monuments
- italic : fifteenth century Italian handwriting
- oblique : similar to italic but based on roman form of typeface
- boldface : characterized by a thicker stroke
- light : a lighter stroke
- thin : an even lighter stroke
- condensed: a version of the roman form
- compressed : extremely condensed styles
- extended: an extended variation of the roman font
INSTRUCTIONS
<iframe src="https://drive.google.com/file/d/1UBjSIl3kXa8sAupQgwWNjhNyr9z9nx_D/preview" width="640" height="480" allow="autoplay"></iframe>
TASK 1 | EXERCISE 1 - TYPE EXPRESSION
1. SKETCH
The first thing I did was make some sketches
for each of the six words in which I will choose 4 that I like the most. The
four words which I ended up choosing is 'Tangle', 'Chop', 'Pull' &
'Wind'.
 |
| Fig. 1 Original sketches of the six words given (27/10/24) |

|
| Fig.2 Type Expression Sketch of Tangle, Chop, Pull and Wind (30/09/24) |
My favorite sketch has to be the pull that's being pulled in all direction as I felt that it was very expressive. The word that made me think the most has to be wind because every idea I had was quite similar to one another.
The lecturer (Mr.Vinod) expresses that my sketches were mostly unreadable, he also said that the type expression doesn't need to be "too much" ,so I want to changed the sketches into something simpler yet still expresses that very word without distorting it or adding too much to the word itself.
I realized my biggest mistake was that I almost didn't do any research for the word itself. So this time, the first thing I did was finding some ideas or reference online which I personally somewhat helped.
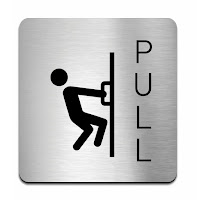 |
| Fig. 3 Pull Reference (30/09/24) |

Using that reference, I utilized the asterisk as the knot on the 't' in 'tangle' and made the letters closer together so that it seems to 'tangling' itself with the other letter. For the chop, I divide the H into two as to make it seems like it was 'chopped' in half and put a little bit and pieces as evidence.
For the wind, I angled and sized it differently to make it seems like it was moving like the wind. While for the pull, I made the 'P' to be like a door handle that is meant to be pulled rather than actually distorting / pulling it in different ways.
 |
| Fig. 5 Final design sketch (30/09/24) |
2. DIGITALIZATION
I then proceed to digitalize the final sketch and placed it in the template given by our lecturer (Mr.Vinod). The result really satisfied me and after some size adjustment and text placement, I finished my digitalization.

|
||||
|
Figure 6. Type Expression digitalized (07/10/24) After the feedback session in
class, I revised the 'Tangle' and 'Pull' to be more interesting and
fitting to the word itself. I separated the word tangle into 3 parts and used '~' and '-' as the rope and tangled it around the 3 parts to connect it with one another. As for the pull, I just stretched the 'P' to make it seems like it's being pulled.
I asked the lecturer's opinion on the revised version of the digitalization in which he expresses that the 'Pull' could be improved more. I was stucked for a bit but managed to revised it to be better by using the fonts to make somewhat a floor and the pulling the 'U' downwards so it looks like it's hanging on the 'floor' while it's being pulled.
Fig. 9 Final Digitalization PDF (27/10/24) |


3. ANIMATION/GIF
I was having a hard time choosing which of the type expression that I want to animate into a GIF. At first I tried with tangle. I made a simple 6 frame animation of it.
 |
| Fig.10 Trial animation of the word 'tangle' (08/10/24) |
I thought that it was too weird for it to come from 2 ways so I tried making the line come from one way.
 |
| Fig. 11 Revision of the 'tangle' animation (08/10/24) |
However, I felt like it was too simple and so I tried to do a wind animation instead. I wanted it to be more detailed by playing with size and opacity as well as the rotation. In the end, it became a 45 frames GIF.

|
| Fig 12. Wind GIF result (13/10/24) |
 |
| Fig.13 GIF Revision 1 (15/10/24) |
The first revision is still too jumpy and doesn't really feel like flowing because it's being blown away by the wind.
 |
| Fig. 14 GIF Revision 2 (15/10/24) |
 |
| Fig. 15 Final GIF Revision (16/10/24) |
1. MINOR EXERCISE
 |
| Fig 16. before kerning and tracking (20/10/24) |

|
| Fig. 17 After kerning and
tracking (20/10/24) |
2. A4 LAYOUT DESIGN

|
| Fig. 18 First layout design (20/10/24) |
I didn't feel the need to explore any more so I submitted the first and only one I made. Through the feedback, I realized that I input the wrong picture as it should be black and white instead of a colorful one like mine so I immediately fixed that by using a color-change website. Mr. Vinod had no other problem with the layout and gave me some tips to fix the ragging on one of the paragraph by using hyphenate only on that specific paragraph. But, I felt a little dissatisfied with the arrangement so I tried to re-arrange it again.
 |
| Fig. 19 Layout Design 4 (21/10/24) |
But in the end I still sticked to the first one because I like the reading flow of it.
 |
| Fig. 20 Final Layout Design Revision JPG (21/10/24) |
 |
| Fig. 21 Final Layout Design Revision with Guidelines JPG (21/10/24) |
Fig. 22 Final Layout Design PDF (27/10/24)
Fig. 23 Final Layout Design with Guidelines PDF (27/10/24)
TEXT FORMAT :
Typeface: Futura Std
Type Size/s: 28 pt
Leading: 24 pt
Paragraph spacing: 0
Font/s: Futura Std Extra Bold
Typeface: Bembo Std
Font/s: Bembo Std Extra Bold
Type Size/s:14 pt
Leading: 24 pt
Paragraph spacing: 0
BODY
Typeface: Serifa Std
Font/s: Serifa Std 55 Roman
Type Size/s: 9 pt
Leading: 12 pt
Paragraph spacing: 12 pt
Characters per-line: 60
Alignment: Flush left
Margins: 25 mm top, 12,7 mm left + right , 100 mm bottom
Columns: 2
Gutter: 5 mm
FEEDBACK
REFLECTIONS
Experience :
I didn't expect typography to be this complicated, it looks so simple yet it somehow feels so restricting and suffocating with the what to do and not to do. When I thought about it, I don't think there are a lot of rules on the topic rather it's more like the best way to do it. So I thinks it's more on me rather than the topic that I had a hard time learning the how to on this topic specifically the type expression. More often than not, I find myself stuck on a problem but eventually I'll find myself somehow solving the problem with just a little bit of experimenting or research. Other than that, I usually don't like feedback as it usually feels more like a critic but the feedback that Mr.Vinod gave doesn't felt negative so I accepted the feedback much more easier. Overall, It's hard and confusing at times but it's actually not that bad and I eventually learned to appreciate the art of typography.
Observation :
I only just noticed that I never use any reference out
of fear of plagiarism but now I see that using reference will not lead
to plagiarism if used correctly as proven by the people around me that
used references yet still manage to make something unique and
different. I at first thought that it doesn't matter if I used them or
not but after trying it out I have noticed that it does make it much
more easier than not using any reference. I've also noticed on how I
rarely record my progress making it easy for me to forget that I need
to record my progress.
I thought that the only one having the hard time was
me because everyone around me seems so calm but after observing
further I found that they too have a hard time but the reason they
seem calm is because this is a learning experience, it's not
something that needs to be too stressed about. So I might need to
adapt that kind of mindset as I thought about the score and the
marks more than the learning experience which is much more
priceless.
Findings :
Typography is more important than you think, a poor
typography work can lead to a poor experience for example poor text
formatting can led to people having a hard time reading or finishing
the text. Typography was also the reason why branding can be very
distinct and unique leading to an easier time identifying a specific
product.
FURTHER READING
WEEK 1
 |
| Fig. 24 Typographic Design Book (24/09/24) |
 |
| Fig. 25 Typography in the past (24/09/24) |
 |
| Fig. 26 Typography in the present (24/09/24) |
This chapter shows examples of typography throughout time starting from the origins of writing in 3150 BCE until today. It's fascinating to see how people started out by carving on rocks, clays and wood compared to the current printed text on paper.
Week 2
 |
| Fig. 27 Typography as a multidimensional language (30/09/24) |
 |
| Fig.28 Examples of type expression (30/09/24) |
Continuing from the same book, I was searching for something that could help me with my type expression when I found this chapter which main point is showing how a typographic message could be read/interpreted in different ways making it a multidimensional language. The examples given were definitely helpful as they show how little changes can bring different impact and meaning.
Week 3
 |
| Fig.29 The traditional method of type printing (07/10/24) |
 |
| Fig.30 The present of printing (07/10/24) |
I continues reading the same book as week 1 and week 2. This time, I read this chapter that contains different machinery that were used for typography throughout time. Starting from the traditional method of hand composition that was tedious and time consuming until the digital typesetting that we're used to now
Week 4
 |
| Fig.31 Chapter introduction (14/10/24) |
 |
| Fig. 32 Typography in motion (14/10/24) |
Still on the same book, continuing to the next chapter of the book that's filled with information regarding typography in motion and what a designer to consider when making a type in motion (the pace, the structures, etc.).
Comments
Post a Comment